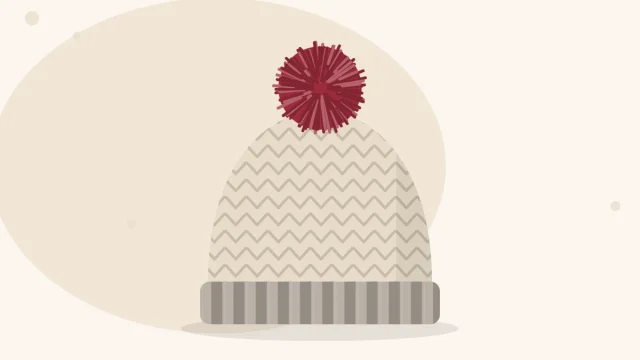
Chunky Flat-Knit Hat on Straight Needles
A quick super bulky hat knitted flat on one pair of straight needles, shaped with six simple decreases per row and sewn up the back.

Tutorial at a glance
Materials
- Super bulky weight (6) yarn, about 65 to 75 yd (60 to 69 m), plus extra for a pom-pom
- One pair of US 13 (9 mm) straight needles
- Large-eye tapestry needle
- Scissors
- Tape measure
A chunky hat on straight needles is about the fastest hat a beginner can make: 50 stitches, around 30 rows, one seam. The piece is knitted flat as a rectangle with a shaped top, then sewn up the back. There is no joining in the round, no double-pointed needles and no cable to wrestle with, and thick yarn makes every stitch easy to see.
This pattern uses super bulky yarn and a single pair of thick needles. If you would rather work without a seam, the chunky hat knitted in the round uses the same yarn and gauge.
What You Need
- Yarn: super bulky weight (6), about 65 to 75 yd (60 to 69 m). Yardage is an estimate, so buy a little extra, especially if you want a pom-pom. Wool or a wool blend gives the ribbing the most spring. The Craft Yarn Council yarn weight system shows how to recognize a weight 6 yarn on the label.
- Needles: one pair of US 13 (9 mm) straight needles, 10 in (25 cm) or longer.
- Notions: a large-eye tapestry needle, scissors and a tape measure.
Gauge and Finished Size
Gauge: 10 stitches and 14 rows = 4 in (10 cm) in stockinette stitch on US 13 (9 mm) needles. That is 2.5 stitches per inch. With yarn this thick, half a stitch per inch changes the hat by several inches, so a quick gauge swatch is worth the ten minutes.
Finished size: about 19.25 in (49 cm) around and 8.5 in (21.5 cm) tall. It is meant to fit a head of about 21 to 22 in (53.5 to 56 cm), stretching to fit. Measure the head you are knitting for before you start.
The cast-on is 50 stitches, but only 48 of them count toward the circumference. One stitch at each edge disappears into the seam: 48 stitches ÷ 2.5 stitches per inch = 19.2 in.
Abbreviations
- CO: cast on
- k: knit
- p: purl
- k2tog: knit 2 stitches together (1 stitch decreased)
- p2tog: purl 2 stitches together (1 stitch decreased)
- RS: right side, the smooth side that faces out when the hat is worn
- WS: wrong side, the bumpy inside
- st/sts: stitch/stitches
The Pattern
CO 50 sts with a stretchy method such as the long-tail cast-on. Leave a tail of about 6 in (15 cm).
Ribbed brim
- Row 1 (RS): K1, (k1, p1) 24 times, k1.
- Row 2 (WS): P1, (k1, p1) 24 times, p1.
- Rows 3 to 6: Repeat Rows 1 and 2 twice more. The brim is 6 rows, about 1.75 in (4.5 cm).
The first and last stitch of each row are seam stitches. Once they are sewn away, the knit and purl columns meet and the ribbing runs unbroken around the hat.
Body
- RS rows: Knit all 50 sts.
- WS rows: Purl all 50 sts.
Repeat these two rows until the piece measures 5 in (12.5 cm) from the cast-on edge, ending after a WS row. At this gauge that is about 18 rows in total, counting the brim.
Crown
The 48 body stitches are divided into 6 sections of 8. Each RS row removes one stitch from every section.
- Row 1 (RS): K1, (k6, k2tog) 6 times, k1 — 44 sts.
- Row 2 and all WS rows through Row 10: Purl.
- Row 3: K1, (k5, k2tog) 6 times, k1 — 38 sts.
- Row 5: K1, (k4, k2tog) 6 times, k1 — 32 sts.
- Row 7: K1, (k3, k2tog) 6 times, k1 — 26 sts.
- Row 9: K1, (k2, k2tog) 6 times, k1 — 20 sts.
- Row 11: K1, (k1, k2tog) 6 times, k1 — 14 sts.
- Row 12 (WS): P1, (p2tog) 6 times, p1 — 8 sts.
Do not bind off. Cut the yarn, leaving a tail of about 24 in (60 cm) for the seam.

Tip
Count your stitches after every decrease row. With only six decreases per row, a missed k2tog is easy to spot and takes seconds to fix on needles this size.
Seaming and Finishing
- Thread the long tail onto the tapestry needle and pass it through the 8 remaining stitches, slipping them off the knitting needle as you go. Run through them a second time, then pull firmly to close the top.
- Fold the piece with the RS facing out and the two side edges together.
- Sew the seam from the crown down to the brim with mattress stitch, working one full stitch in from each edge. Catch the horizontal bar between the edge stitch and its neighbor, first on one side and then on the other, and pull the yarn snug every few rows.
- At the cast-on edge, fasten off and weave both tails into the seam allowance on the WS.
Super bulky seams are bulkier than fine ones, so keep to that single edge stitch on each side and avoid taking in more. The guide to finishing a knit hat covers weaving in ends and blocking in more detail, and a large yarn pom-pom sits nicely over the gathered top.
Watch out
Do not pull the seam yarn so tight that the back of the hat puckers. The seam should lie flat and stretch with the fabric.
Ways to Adjust the Hat
Change the size
Stitch counts stay 6 sections plus 2 seam stitches, so the crown still works. Head sizes are typical ranges, so measure first.
| Size | Cast on | Finished circumference | Brim rib | Length before crown | Crown starts at |
|---|---|---|---|---|---|
| Child (head about 18.5 to 19.5 in) | 44 sts | 16.75 in (42.5 cm) | (k1, p1) 21 times between edge sts | 4.25 in (11 cm) | Row 3 |
| Adult medium (as written) | 50 sts | 19.25 in (49 cm) | (k1, p1) 24 times | 5 in (12.5 cm) | Row 1 |
| Adult large (head about 23 to 24 in) | 56 sts | 21.5 in (55 cm) | (k1, p1) 27 times | 5 in (12.5 cm) | Extra row, below |
For the large size, begin the crown with one extra RS row: K1, (k7, k2tog) 6 times, k1 — 50 sts. Purl one WS row, then work Rows 1 to 12 as written. The extra pair of rows makes the large hat about 9 in (23 cm) tall.
Add a folded cuff
Work the ribbing for 14 rows, about 4 in (10 cm), instead of 6, and knit the body until the piece measures 7.25 in (18.5 cm) from the cast-on before the crown. Plan on roughly 20 yd (18 m) more yarn. When seaming, sew the lower half of the ribbing from the opposite side so the seam is hidden when the cuff is turned up.
If this hat goes well, the same construction in thinner yarn is the easy flat-knit hat in worsted weight, which gives more practice with mattress stitch.
Frequently asked questions
Why does the pattern cast on 50 stitches if the hat is sized on 48?
One stitch at each edge is taken into the mattress-stitch seam and ends up on the inside of the hat. The 48 stitches that remain visible, at 2.5 stitches per inch, give the finished circumference of about 19.25 in (49 cm).
Can a complete beginner knit this hat?
Yes, if you can cast on, knit, purl and knit two stitches together. The piece is worked back and forth in rows, and the thick yarn makes each stitch easy to see and count.
Will the seam show on a chunky hat?
Mattress stitch worked one stitch in from each edge pulls the two sides together so the columns of stitches line up, and the join is hard to spot from the outside. Inside, the seam forms a small ridge that is worn at the back of the head.
How much yarn should I buy?
The adult medium size takes roughly 65 to 75 yd (60 to 69 m) of super bulky yarn. That is an estimate, so buy a little more, and allow extra for a folded cuff or a pom-pom.