Crown Decreases: How to Shape the Top of a Knitted Hat
How hat crown decreases work: dividing the stitches into sections, choosing k2tog or ssk, and deciding how often to decrease for a rounded top.
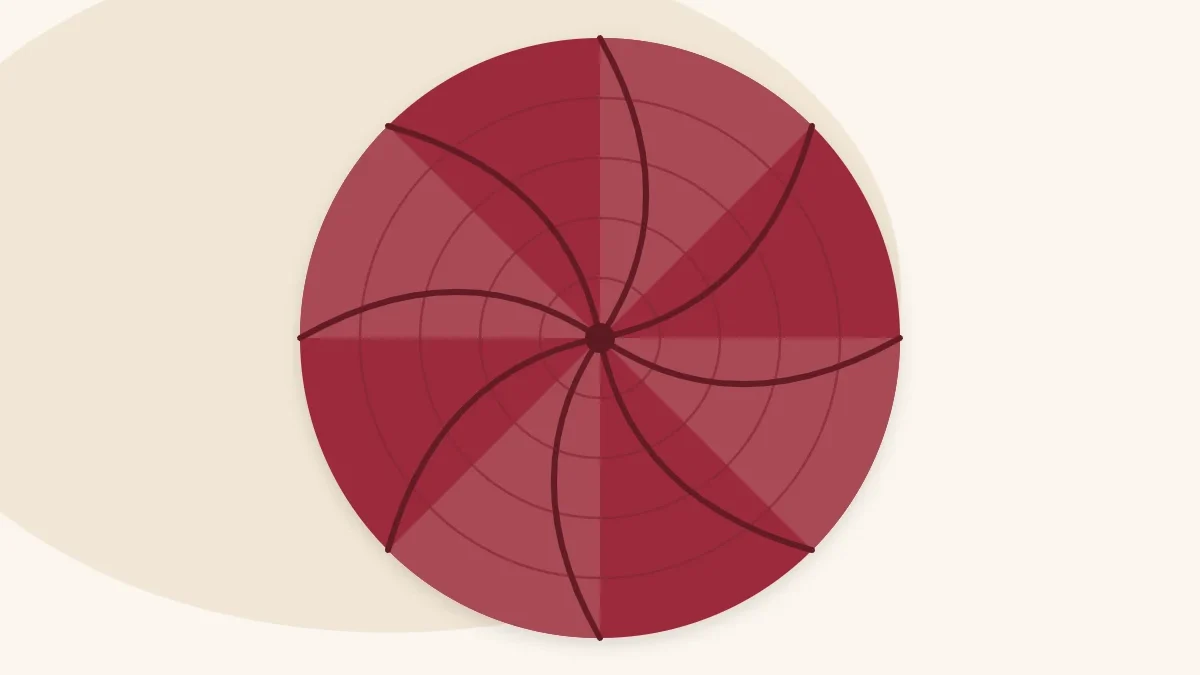
Hat crown decreases turn a straight tube of knitting into a dome. You divide the stitches into equal sections, remove one stitch from each section on every decrease round, and keep going until only a handful of stitches remain to be gathered shut. Once the logic is clear, you can shape the top of any hat, check a pattern for errors, or fix a crown that came out too pointed.
How a Crown Is Built
Three decisions shape every crown:
- How many sections. Each section loses one stitch per decrease round. Six or eight sections are the most common for beanies.
- Which decrease. The stitch you use decides whether the lines lean right or left.
- How often. Plain rounds between decrease rounds make the crown taller and rounder. Decreasing every round makes it short and flat.
The stitch count has to divide evenly by the number of sections. That is why hat patterns favor counts such as 88 (8 sections of 11) or 48 (6 sections of 8). If you are still choosing a number, the guide to how many stitches to cast on for a hat shows how to land on a count that suits both the brim ribbing and the crown.
The Two Basic Decreases
Abbreviations here follow the Craft Yarn Council list of knitting abbreviations.
- k2tog (knit 2 together): insert the right needle into the next 2 stitches at once, as if to knit, and knit them as one. The result leans to the right.
- ssk (slip, slip, knit): slip 2 stitches one at a time as if to knit, then insert the left needle into the fronts of both and knit them together. The result leans to the left.
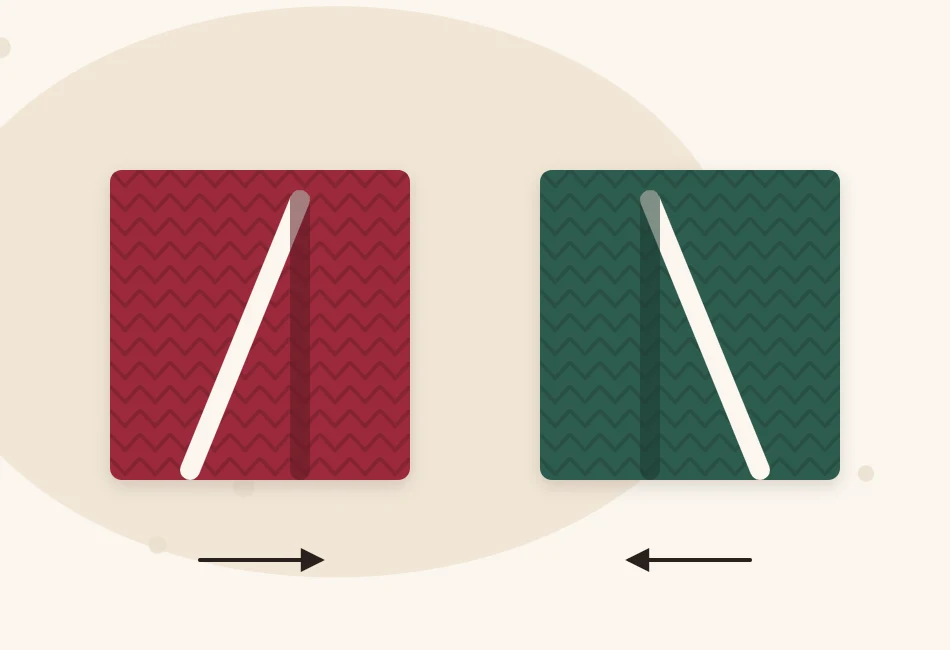
A crown worked entirely in k2tog shows lines that swirl gently toward the center. That is the standard beginner crown, and it looks deliberate. For straight lines, use the two decreases as a pair on either side of a marker, as described further down.
A Worked Example: 88 Stitches in 8 Sections
Take an adult hat in worsted weight (4) yarn at 18 stitches and 24 rounds = 4 in (10 cm). With 88 stitches it measures about 19.5 in (49.5 cm) around. Divide 88 by 8 and each section holds 11 stitches. On the first decrease round, the last 2 stitches of every section become 1, so you knit 9 and then k2tog.
| Decrease round | Work this 8 times | Stitches left |
|---|---|---|
| 1 | K9, k2tog | 80 |
| 2 | K8, k2tog | 72 |
| 3 | K7, k2tog | 64 |
| 4 | K6, k2tog | 56 |
| 5 | K5, k2tog | 48 |
| 6 | K4, k2tog | 40 |
| 7 | K3, k2tog | 32 |
| 8 | K2, k2tog | 24 |
| 9 | K1, k2tog | 16 |
| 10 | K2tog | 8 |
Notice the pattern: the number of knit stitches before each k2tog drops by one every time, and the total drops by 8. If your count after a round is not a multiple of 8, a decrease was missed or doubled in that round.
Tip
Place a marker after every section on the first decrease round. From then on the instruction is simply “knit to 2 stitches before the marker, k2tog”, and there is nothing to count.
The classic knit beanie uses this 8-section crown. Thicker yarn usually gets fewer sections: the chunky knit hat divides 48 stitches into 6 sections of 8, because eight lines of bulky decreases would crowd the top.
Rounded or Pointed: How Often to Decrease
The table lists decrease rounds only. What you do between them sets the shape.
- A plain knit round after every decrease round gives a rounded dome. In the example, 10 decrease rounds plus 9 plain rounds make 19 rounds, a little over 3 in (about 8 cm) of crown at 6 rounds per inch.
- Decreasing every round uses 10 rounds, under 2 in (5 cm). The top closes quickly and sits flat, which can make the fabric gather where the crown starts.
- Two or more plain rounds between decreases stretch the crown into a cone.
Many hats mix the two: alternate decrease and plain rounds while there are plenty of stitches, then decrease every round for the last three or four. The final rounds have so few stitches that plain rounds between them would form a little point.

Whatever rate you choose, add the crown height to your plan. A hat that should be 8.5 in (21.5 cm) tall with a 3 in (7.5 cm) crown needs its decreases to start at 5.5 in (14 cm).
Straight Lines with Paired Decreases
For four crisp ridges instead of a swirl, split the stitches into 4 sections and decrease at both ends of each one. With 88 stitches, each section has 22:
Decrease round: (K1, ssk, knit to 3 stitches before the marker, k2tog, k1) 4 times — 8 stitches decreased.
On the first round that means k1, ssk, k16, k2tog, k1 in each section, leaving 80 stitches. The count per round drops by 8, exactly as in the table, so the crown height stays the same.
When the Stitch Count Does Not Divide
Say a hat has 90 stitches. Eight sections will not work, but there are easy ways out:
- Use a number of sections that does divide: 6 sections of 15, 9 sections of 10, or 10 sections of 9.
- Knit one setup round that removes the extras. Two k2tog spaced half a round apart bring 90 down to 88, and the 8-section table applies.
If This Happens, Do That
| Problem | Likely cause | Fix |
|---|---|---|
| Pointed tip | Plain rounds continued to the very end | Decrease every round once about a third of the stitches remain |
| Puckers where the crown begins | Decreasing too fast at the start | Add a plain round after each of the first few decrease rounds |
| Hat too tall | Crown started at full hat height | Rip back and start the crown about 3 in (7.5 cm) sooner |
| Stitches stretched tight on the needle | Too few stitches for a 16-inch circular | Switch to double-pointed needles or magic loop |
Watch out
A decrease worked on the wrong stitches shifts every line after it. If a k2tog does not sit directly above the one from the previous decrease round, stop and count that section before knitting on.
That last row of the table catches almost everyone on a first hat. The options are compared in the guide to needles for knitting hats. When 8 or so stitches remain, the knitting is done: cut the yarn and close the top and finish the hat.
Frequently asked questions
How many sections should a hat crown have?
Six or eight sections suit most beanies. Eight is common for worsted and DK yarn, and six is common for bulky and super bulky yarn. The stitch count must divide evenly by the number of sections.
When should I start the crown decreases?
Subtract the height of the crown from the total hat height. A rounded 8-section crown in worsted yarn is about 3 in (7.5 cm) tall, so a hat planned at 8.5 in (21.5 cm) starts its decreases at about 5.5 in (14 cm).
Is k2tog or ssk better for a hat crown?
Either works. A crown made only with k2tog has lines that swirl slightly, which is the usual beginner finish. Using ssk and k2tog as a pair on each side of a marker gives straight, symmetrical lines.
How many stitches should be left at the end?
Usually one stitch per section, so 6 or 8 stitches. Cut the yarn, thread the tail through those stitches and pull to close the top.