10 Common Hat-Knitting Mistakes (and How to Fix Them)
Hats that turn out too big, twisted joins, tight cast-ons and lumpy crowns all have simple causes. Here are ten common hat-knitting mistakes and a practical fix for each.
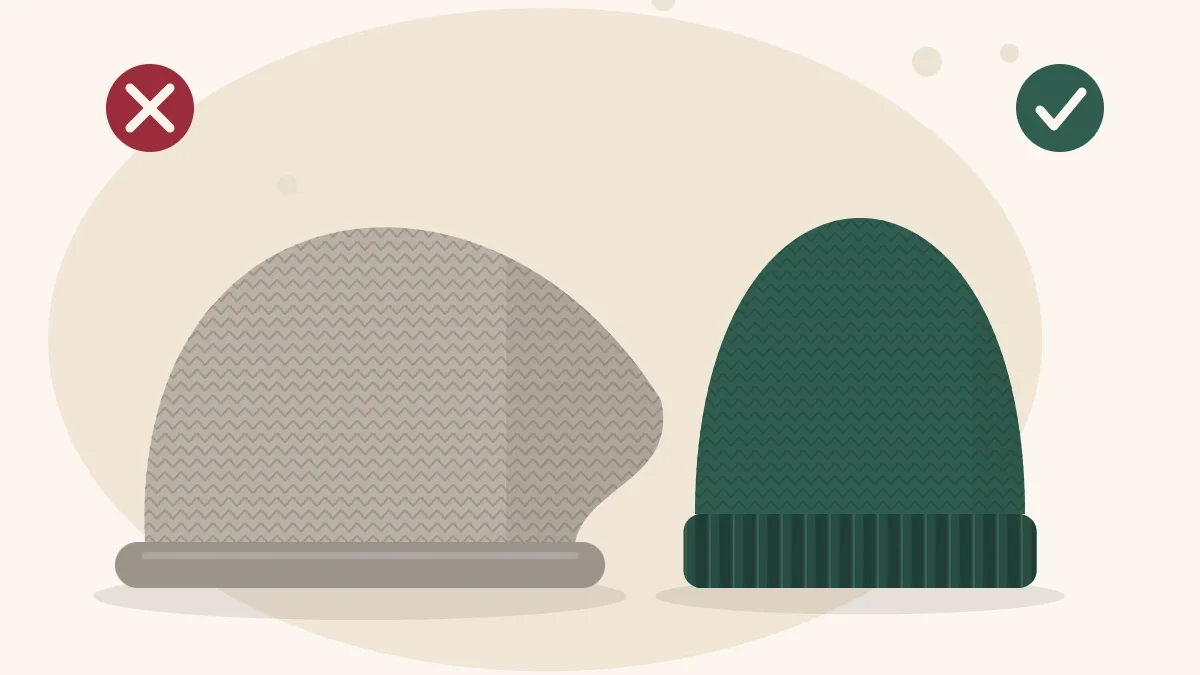
Most hat knitting mistakes fall into two groups: sizing errors made before the first stitch, and small slips made while knitting. The first group produces hats that are too big, too tight or too short. The second produces twists, ladders and lumpy tops. Nearly all of them are easy to prevent, and several can be fixed without starting over.
Quick diagnosis
| If the hat… | The likely cause | See mistake |
|---|---|---|
| Slides down over the eyes | No gauge swatch, or no negative ease | 1, 2 |
| Leaves a mark on the forehead | Tight cast-on | 3 |
| Has a spiral twist in the brim | Twisted join | 4 |
| Has a brim that flares or goes slack | Brim knit on needles that are too large | 5 |
| Rides up above the ears | Crown started too soon | 6 |
| Has a pointed or puckered top | Decreases spaced or paced unevenly | 7 |
| Shows loose vertical lines near the top | Ladders between needles | 8 |
Sizing mistakes
1. Skipping the gauge swatch
A pattern’s size is only true at the pattern’s gauge. At 4.5 stitches per inch, 88 stitches make a hat about 19.5 in (49.5 cm) around. Knit the same 88 stitches at 4 stitches per inch and the hat measures 22 in (56 cm), 2.5 in (6.5 cm) larger. Half a stitch per inch is easy to miss by eye.
The fix: knit a swatch at least 5 in (13 cm) wide in the same stitch, wash it the way the hat will be washed, and measure it dry. If there are too few stitches per inch, go down a needle size; too many, go up. The full method is in gauge swatch for hats.
2. Knitting the hat the same size as the head
Knitted fabric stretches, and a hat only stays on if it has to stretch a little. A hat made to the exact head measurement will slip and slouch. Aim for about 1.5 to 3 in (4 to 7.5 cm) of negative ease, roughly 5 to 15 percent smaller than the head.
The fix: measure the head, subtract the ease, then calculate. The steps are in how many stitches to cast on for a hat. For a gift, the Craft Yarn Council’s head circumference chart lists typical sizes by age, though a real measurement is always better.
3. Casting on too tightly
Ribbing can stretch a long way, but only as far as the cast-on edge allows. A tight edge digs in, is hard to pull over the head and may eventually snap.
The fix: cast on over a needle two sizes larger, or leave a little more space between stitches as each one is made. Test by stretching the edge between both hands: it should open as wide as the ribbing above it.
Mistakes at the brim
4. Twisting the stitches when joining
If the cast-on edge wraps around the needle before the round is joined, the tube is knit with a permanent twist in it. No amount of knitting will undo it.
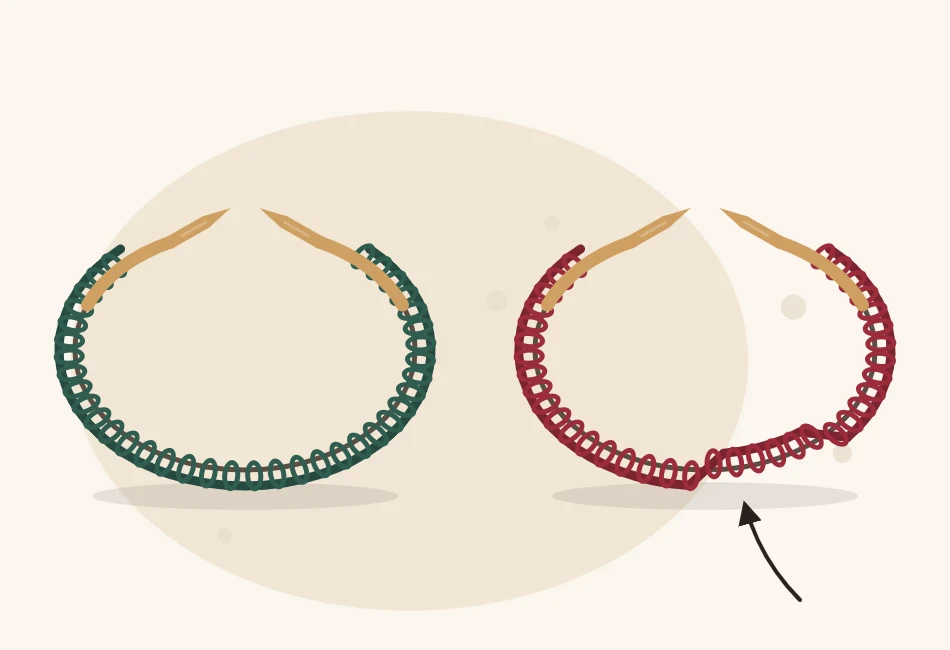
The fix: before joining, lay the needle on a table and check that the edge sits on the inside of the ring all the way around. Check again after the first round, when a twist can still be worked out by rotating the stitches at the join. After several rounds, the only cure is to start again. See joining in the round without twisting your stitches.
5. Knitting the brim on the body needles
Ribbing knit on the same needles as the body is often loose. It may flare outward or relax after a few wears.
The fix: work the brim on needles one or two sizes smaller, for example US 6 (4 mm) for a body knit on US 8 (5 mm). The tighter ribbing grips better and recovers after stretching.
Mistakes in the body and crown
6. Starting the crown too early
Impatience makes hats short. If the decreases begin too soon, the finished hat perches on top of the head and leaves the ears uncovered.
The fix: measure with the knitting lying flat and unstretched, from the cast-on edge straight up. For a fitted adult hat with a crown of about 3 in (7.5 cm), the body usually needs to reach roughly 5 to 5.5 in (12.5 to 14 cm) first, for a total of about 8 to 8.5 in (20 to 21.5 cm). If trying it on is possible, the needle should sit about 3 in (7.5 cm) below the top of the head when decreasing starts.
7. Decreasing unevenly, too fast or too slowly
Crown shaping depends on equal sections. If the stitch count does not divide evenly, one wedge ends up wider and the top spirals off-center. Decreasing on every round from the start closes the top abruptly and causes gathers; decreasing too slowly leaves a cone.
The fix: choose a cast-on that divides by the number of sections, place a marker between sections and count after each decrease round. The usual rhythm of one decrease round followed by one plain round gives a rounded top. The guide to crown decreases explains how to change that rhythm on purpose.
8. Ladders between needles
On double-pointed needles or magic loop, the stitch on each side of a gap can stretch, leaving a loose vertical column.
The fix: pull the yarn firmly on the second stitch of each needle, not just the first. Shifting the gap by a stitch or two every few rounds also prevents the looseness from stacking up in one line. Light ladders often even out with washing.
Mistakes at the finish
9. Leaving a hole at the top
Threading the tail once through the last stitches and pulling can leave a small opening that widens with wear.
The fix: pass the tail through the remaining stitches twice before tightening, take it to the inside through the center, and secure it with a few small stitches on the wrong side.
10. Trimming the ends too short
A hat is stretched every time it is put on, and short ends work loose quickly.
The fix: leave tails of at least 6 in (15 cm). Weave each one through the wrong side for about 2 in (5 cm), change direction once, stretch the fabric gently, and only then trim.
Watch out
Do not rely on blocking to rescue a hat that is the wrong size. Washing evens out stitches and relaxes fabric a little, but it will not remove an inch or two of extra circumference in wool, and it tends to make cotton and superwash hats larger, not smaller.
With the head measured, the swatch checked and markers on hand, a pattern such as a first hat on circular needles becomes a matter of following the rounds.
Frequently asked questions
Why did my knitted hat turn out too big?
The usual causes are a gauge looser than the pattern's and a lack of negative ease. Even half a stitch per inch fewer than the pattern states can add more than two inches to an adult hat. Swatch first and make the hat about 1.5 to 3 inches smaller than the head.
Can I fix a twisted join after a few rounds?
Only very early. After the first round the twist can sometimes be rotated out at the join, where a single strand connects the ends. Once several rounds are knit, the twist is permanent and the hat needs to be restarted.
How do I stop the top of my hat from being pointy?
Space the decreases in equal sections and work a plain round between decrease rounds so the crown narrows gradually. A point usually means the decreases were too slow near the end; working the last few decrease rounds without plain rounds between them flattens the top.
Can blocking shrink a hat that is too large?
Not reliably. Blocking smooths stitches and can relax fabric, which usually makes a hat slightly larger. A hat that is clearly too big is best reknit with fewer stitches or on smaller needles.